
The first thing I added is a gallery wall of family photos. These are the first pictures I’ve printed in the past 6 years or so. 6 years! I’m thinking of starting a project of organizing the photos into digital pages and getting them printed. Maybe if I put in half an hour a day I’ll be able to get it done in a… year? or two?

(Sorry about the blurry pictures, I have a “thing” about posting family pictures on the blog)
In any case, I spent a lot of time planning the gallery and in the end I missed a basic flaw in my design – I didn’t take into account that the frame added a fixed width to the pictures (and not a percentage) and had to redesign the whole thing. So, here’s the process I recommend:
- Choose your pictures. Decide on a relatively small number, 10-15 in all. You’ll be surprised how easy it is to choose family pictures when you’re so limited. Only the best of the best make the cut.
- Go buy frames to match the pictures. Choose different sizes and even proportions – they don’t have to match the pictures exactly, you can always crop them a little bit to make them match the frame.
- Arrange the frames on the floor to your liking. Take a picture of the arrangement. Upload it to your computer, paste your pictures into the frames (resizing as necessary). Don’t worry about fitting them in exactly, the point here is to decide which picture goes where so you can determine which size to print them. If, at this point, you decide there’s a problem with the arrangement of the frames – you can still rearrange them, and no harm done!
- Trace the arrangement of the frames onto a large piece of paper or newspaper (or a few pieces of paper glued together, which is what I had to do). Add a mark for where the nail needs to go to hang the frame. I used IKEA frames, so I just took the transparent part out, and marked the location straight through the frame, but if you can’t – measure and mark. It’s easier when it’s all laid out like that. If you have several different types of frames, you might as well write them down on the sketch, or use the picture from your computer as a reference.
- Get your pictures printed and in the frames. Tape your sketch to the wall and hammer your nails into the wall (or get your husband to do this part, as I did) according the the marks on the sketch.
- Hang your frames and step back to enjoy the view.
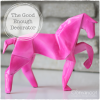
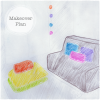
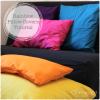
The second trendy item I added is a succulent terrarium. It matches the house plant we already had quite nicely and fits in with the furniture perfectly. I’m pretty sure that one of them has bright pink blossoms which will fit in perfectly with the pink horse on the other side of the room.
Succulents, gallery wall – I am now ready to be featured in any decor blog/magazine. Right?


And look, soon we will have kumquats!

Now, which room to tackle next?


[…] ארטשטיין מהבלוג Oomanoot פתרה עבורי את התעלומה וגילתה לי איך היא תלתה את הקולאז' […]