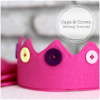
I don’t think this post needs much of an introduction. I wanted a new skirt, I had this great fabric (from budulina), I was inspired one evening – I sat down and made it.
I made an attempt to make a skirt a few months back, and it was great until I had to install the zipper. I made a crucial mistake somewhere along the road and the zipper wouldn’t close! It wasn’t my first zipper, so I’m not sure exactly what went wrong, but I was not about to make the same mistake on this skirt, and I must say I’m very proud of the result. I don’t have a serger, so I decided to go with french seams for a perfect finish.
This skirt is relatively easy to make, and apart from the zipper (which can be intimidating) and the button hole (which can be annoying) it’s all sewing in straight lines – no fuss no bother. The design is classic and sweet and can be used for little girls as well as grown ups. Choose fun and unique fabrics to get that wow effect!
If you follow my tutorials you may have seen this before – where possible I make my instructions to your size. Simply enter your waist measurement and the desired length (top of the waist band to the edge of the skirt) and I will calculate the fabric pieces you need. Go ahead, try it yourself!
Waist measurement: cm
Materials
- 2 fabric rectangles 88cm X 48cm for main skirt pieces. Make sure the pattern matches on both pieces, it will be quite obvious if they don’t.
- 1 long fabric strip 95cm X 10cm for waist band
- 1 long interfacing strip 93cm X 4cm for waist band
- 1 18 cm zipper
- 1 button
- Basic sewing notions
Instructions
-
Iron your interfacing on to the waist band fabric, 1 cm from each edge for seam allowance (it will be 5 cm from the opposite long edge). Fold over short edges 1cm and press. Fold over the long edge without interfacing 1 cm and press.

-
Place your main fabric pieces together wrong sides facing (yes, wrong sides – remember, we’re doing french seams here). Align the top of the zipper (including the allowance past the zipper pull) with the top of the skirt. Mark the edge of the zipper, and pin from that point to the bottom. Pin along the other short edge (all the way from top to bottom). Sew pinned edges 1/2 cm from the edge. Remove the pins, turn inside out. Fold over the edges where the zipper will go to match the seam you sewed and press all seams flat.
-
Repin the seams, same as in step 2 (this time the right sides will be facing). Sew 1 cm from the edge (to ensure that the raw edges are incased in the second seam). Same as before, fold over the edges where the zipper will go to match the seam you sewed and press all seams flat.
 This is where the zipper will go:
-
Turn the skirt right side out. Pin the zipper into place behind one of the folded edges. Using the zipper foot, carefully edge stitch the fabric to the zipper, moving the pull out of the way as you sew. Do the same for the second edge. Sew across the bottom edge of the gap to secure the zipper bottom to the skirt. Turn skirt inside out. See how the raw edge of the fabric is under the zipper?

Zig zag stitch the zipper and the folded fabric together for a clean finish.
[By the time I got to this step it was very late and I stopped taking pictures… sorry]
-
Hem the bottom edge of the skirt (fold over 1 cm, press, fold over 1 cm again, press, sew around). Turn skirt right side out.
-
Prepare gathers: Set your sewing machine on the longest straight stitch it has and sew around the top of the skirt. Do not backstitch at the start and end! Pull the bottom thread gently to create gathers. Distribute them evenly around the skirt, using the waist band as a guide for the final width. Note that the waist band includes 7cm extra for the button tab and seam allowance.
-
Align the folded short edge of the waist band with the zipper edge and the long interfaced edge with the gathered skirt top, right sides facing. Pin into place and sew around the skirt 1cm from the edge (stopping at the other side of the zipper). Fold waist band upwards along sewn seam, fold over the button tab to match and press.
-
Fold the waist band down over to the wrong side of the skirt top, so that the raw edges are sandwiched between the folded long edges. Pin into place, making sure that the folded edge on the wrong side is slightly lower than the sewn edge on the right side. This way, you are sure to catch the inside edge when you sew from the outside. Make sure the button tab and short edges are nicely aligned and that the zipper raw edges are hidden inside. With the skirt right side out, top stitch as close to the edge as possible, starting from the bottom of the waist band, continuing on the button tab and ending back where you started.
Make the button hole on the waist band (about 1-2cm from the edge). Attach the button to the button tab.
Enjoy!

[This tutorial is free for commercial use. Please read the Terms & Conditions for further details.]